Import PST in OWA – Updated 2026 Solutions


If you need to access your old Outlook emails in Outlook on the Web (OWA), you can’t directly import PST in OWA. Instead, you’ll need to upload the PST to your Outlook desktop app or use the Microsoft 365 Import Service, i.e. Network upload, or Drive Shipping. Through this guide, I’m going to explain all these solutions step by step to move PST within minutes.
So, let’s start our discussion:
Know the Distinction Between PST File and O365
Before we explore how to import PST file to Outlook 365, it is necessary to have a clear insight into the PST and Office 365:- PST File: PST (Personal Storage Table) is a file extension for the Microsoft Outlook email application. It permits its users to access components of several accounts configured to Outlook by a personal Outlook data file for every specific user. After you have configured an account in Microsoft Outlook, when a new element is displayed, it will always store that information in a .pst file format.
- Microsoft Office 365: In comparison to Microsoft Outlook (a desktop-based application), Office 365 is a web-based Outlook and hence, it is prominently referred to as OWA – Outlook Web Access. Any new components displayed in Office 365 will be stored on its server and can be accessed through the server only over the internet.
Also Read: How to Extract Calendar From PST File?
Methods to Import PST in OWA Step by Step
Use the following methods to successfully import PST data into your Outlook on the Web mailbox:
#Solution 1. Import PST file to Outlook 365 Using Network Upload
You can import the PST file into Outlook Web using the Microsoft-provided Network Upload method. However, we will provide you with the easy fixes for that, which are listed below. After that, follow the brief steps which are mentioned below.
Quick 5 Steps for Network Upload MethodHere are the detailed steps to import PST in OWA:
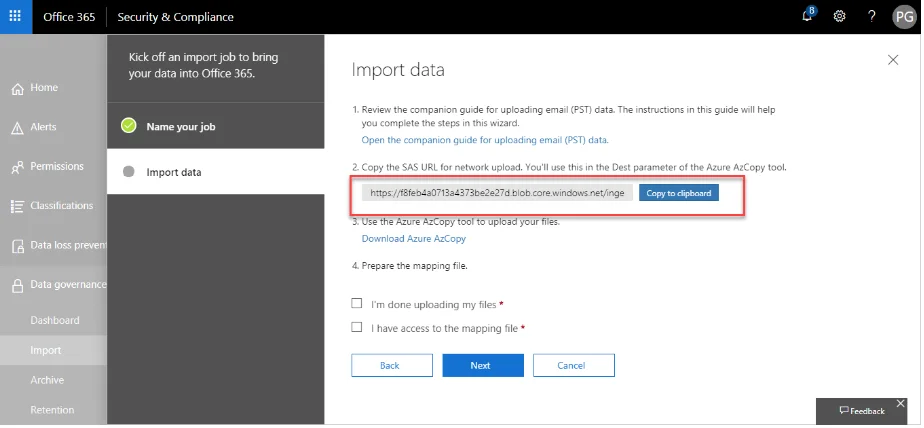
- First copy the SAS URL
- Download the AzCopy
- Create PST import job
- Now create PST import job
- Filter the data and start import job
- Use compliance.microsoft.com.
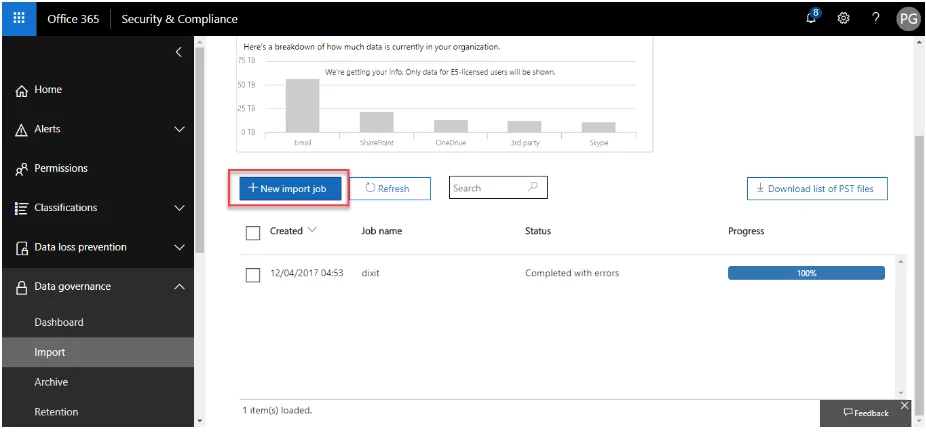
- Then go to Data Lifecycle Management > Microsoft 365 > Import.
- Now open the Import tab and click on (+) New import job.
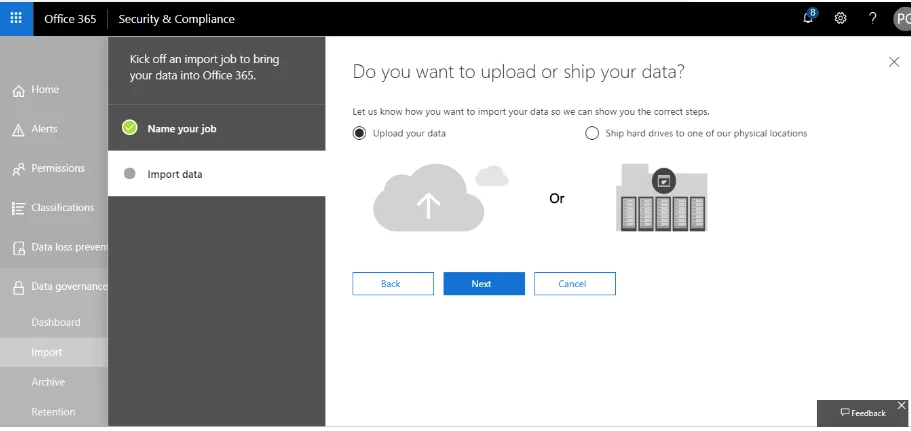
- It’s time to choose the option of Upload your data from the wizard.
- Copy the SAS URL and download the Azure AzCopy utility on the machine.
- Run the command prompt on the local system to import PST in OWA.
- Execute azcopy.exe copy “<Source location of PST files>” “<SAS URL
azcopy.exe copy "\\FILESERVER1\PSTs" "https://3c3e5952a2764023ad14984.blob.core.windows.net/ingestiondata?sv=2012-02-12&se=9999-12-31T23%3A59%3A59Z&sr=c&si=IngestionSasForAzCopy201601121920498117&sig=Vt5S4hVzlzMcBkuH8bH711atBffdrOS72TlV1mNdORg%3D"
- By using Azure Storage Explorer, verify all the uploaded files.
- Prepare a CSV file to specify the location of the destination of the mailboxes.
- Choose “ I’m done uploading my files” and “I have access to the mapping file” in the Import Data wizard,
- Upload the prepared CSV file by clicking on (+), select the mapping file, and then validate.
- Now save and close.
- Now, Microsoft analyses the data and returns the age of the data to do some filtering.
- Click Import Data to import PST file to Outlook 365.
- It is a very time-consuming and complex process. That’s why the administrators are also avoiding it.
- The chances of the data being lost are high.
- Need to maintain the essential internet bandwidth.
- This approach is not recommended for multiple imports.
- Does not support the PST files greater than 2 GB.
#Solution 2. Use Drive Shipping to Import PST in OWA
Drive shipping is a Microsoft 365 import method where you copy your PST files to a hard drive and physically ship them to Microsoft. They upload the data to your mailbox. Here’ how:
- Make sure the PST file is prepared with the appropriate names and hierarchy.
- Now copy the PST file into the hard drive, and the file should be virus-free.
- Make use of BitLocker for the encryption of files as per the Microsoft Guidelines.
- Now, create a drive shipping request to Microsoft.
- Pack the hard drive with the necessary documents. Then, choose the shipping service to ship the hard drive to the Microsoft data center.
- Track the shipping continuously. You will be notified after the completion of the process.
- After that, you can verify your data in Outlook 365.
- Not sure that the data will reach the data center without any loss.
- Microsoft charges 2$ per GB due to which makes it not affordable to import PST in OWA, especially with large data.
- You need to manage the shipping of the data regularly.
Related: How to Extract Emails from PST File Without Outlook Installation?
#Solution 3. Import PST File Data to MS Outlook 2021, 2019, 2016, 2013, 2010
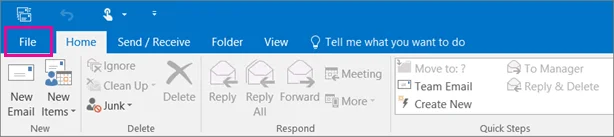
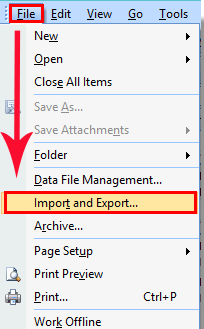
Another reliable method is to import your PST file directly into the desktop version of Microsoft Outlook (2021, 2019, 2016, 2013, or 2010). Once imported, Outlook syncs the data with your Exchange or Microsoft 365 mailbox, making the data available in Outlook on the Web (OWA). This means we’re doing indirect import PST in OWA via this. Follow the steps below to achieve it:- Click on the File tab.
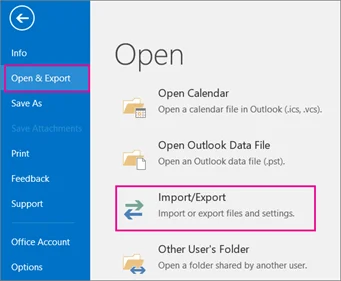
- Choose Open&Export >> Import/Export.
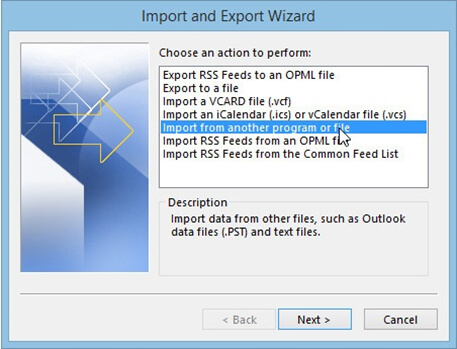
- Click on Import from another program or file and Next.
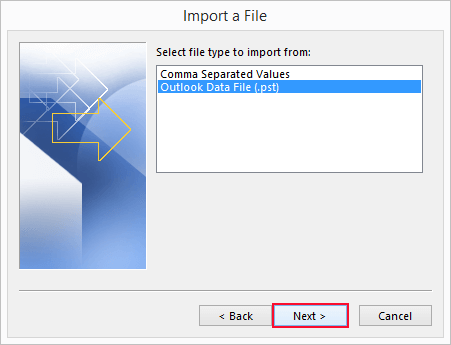
- Choose Outlook Data File(.pst) and next.
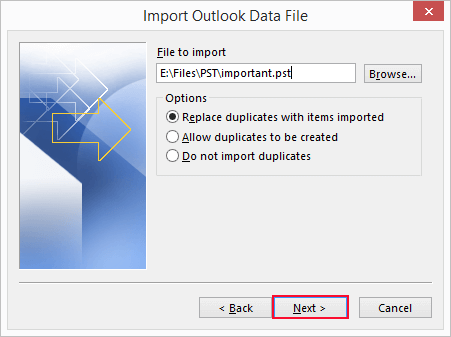
- Now browse the PST file to import and hit Next.
- Click Finish, and the data imports successfully.
- Click on the File option and choose Import and Export.
- Hit Import from another program or file, and then Next.
- Choose the option of Outlook Data File(.pst) and Next.
- Now, click on Browse for the location of the PST file that is going to be imported and hit Next.

- Hit the Finish button for successful importing.
- Creates errors while importing multiple PST files.
- You will not be able to migrate the large PST files.
- Only limited features are there.
- It takes a lot of time for large data migrations.
#Solution 4. Import PST in OWA Via Cutting-edge Solution
The above-stated manual methods have some limitations that affect the procedure badly. Here is an alternative to overcome all the constraints of manual ways, i.e. Office 365 Import tool. With the help of this software, a user can easily import a PST file directly into Outlook Web Access, without downloading, shipping, or uploading hassles.
Before any commitment, you can try its robust performance for free now!Moreover, this utility provides complete PST data migration, like emails, contacts, calendars, and tasks, to Office 365 accounts. Additionally, it is capable of executing incremental imports from the same PST file after the first attempt. Plus, it facilitates an understandable user interface. So, a non-technical user can also use it without any professional help.
Why am I suggesting this solution to import PST in OWA over manual methods?- Able to migrate PST file data such as email, contacts, and calendars.
- Migrate the shared mailboxes to Office 365 effortlessly.
- There is also an Account Import Priority option to import the respective account first.
- Import PST into Gmail, Exchange Server, and Office 365 Archive mailbox
- Retains all attributes of emails, such as attachments and metadata, after the migration.
- You can use Delta Import to import the newly arrived data.
- It is compatible with any size of PST file.
Procedure to Import PST File to Outlook 365 Using this Automated Software
Follow these steps to quickly import PST in OWA using the specified solution:- Download and run the tool. Select Outlook as a source and Office 365 as the destination.

- Select the categories for import in Office 365. After that, apply the date range filter and tap on next.

- Now, provide the .PST folder path to the software and validate the permissions.

- Now enter the admin email and application ID in the destination window, validate, and next.

- Insert the users into the tool through several options, such as fetch users, import users, and download template.

- Now, from this interface, you can search for a specific mailbox through this search panel

- Finally, after validation of the users, click on the start import button.

Author’s Verdict
To learn how to import PST in OWA, the admin is required to import PST to Exchange Online. In the above section, we discussed the manual and automated solutions to do the same.
A free technique has some disadvantages. So, it is always the best idea to go with the above-mentioned smart software. It is an eminent solution to import PST file to Outlook 365 without any hindrance. Thus, a user can opt for any one of them as per their preference.
People Also Ask (FAQs)
Q. Are the admin credentials necessary for the import process?A. No, if you are importing PST files into your Office 365 OWA, then you just need to log in with your Office 365 credentials.
Q. Is it possible to import selective data from my PST file?A. Yes, use the Category and Filter options available during the import process.
Q. Is there any file size restriction while importing PST files in O365?A. No, there is no file size limitation during the import process.
Q. Can I bulk import PST in OWA?A. Yes, using the ‘Add Folder’ option, the user can import multiple PST files simultaneously.