FreeViewer
Office 365 Export Mailbox to PST
Save Mailbox Items from Office 365 to Outlook PST, EML, MSG, MBOX, and PDF Format
Download Now
Safe & Secure
Purchase Now
30 Days Money Back*
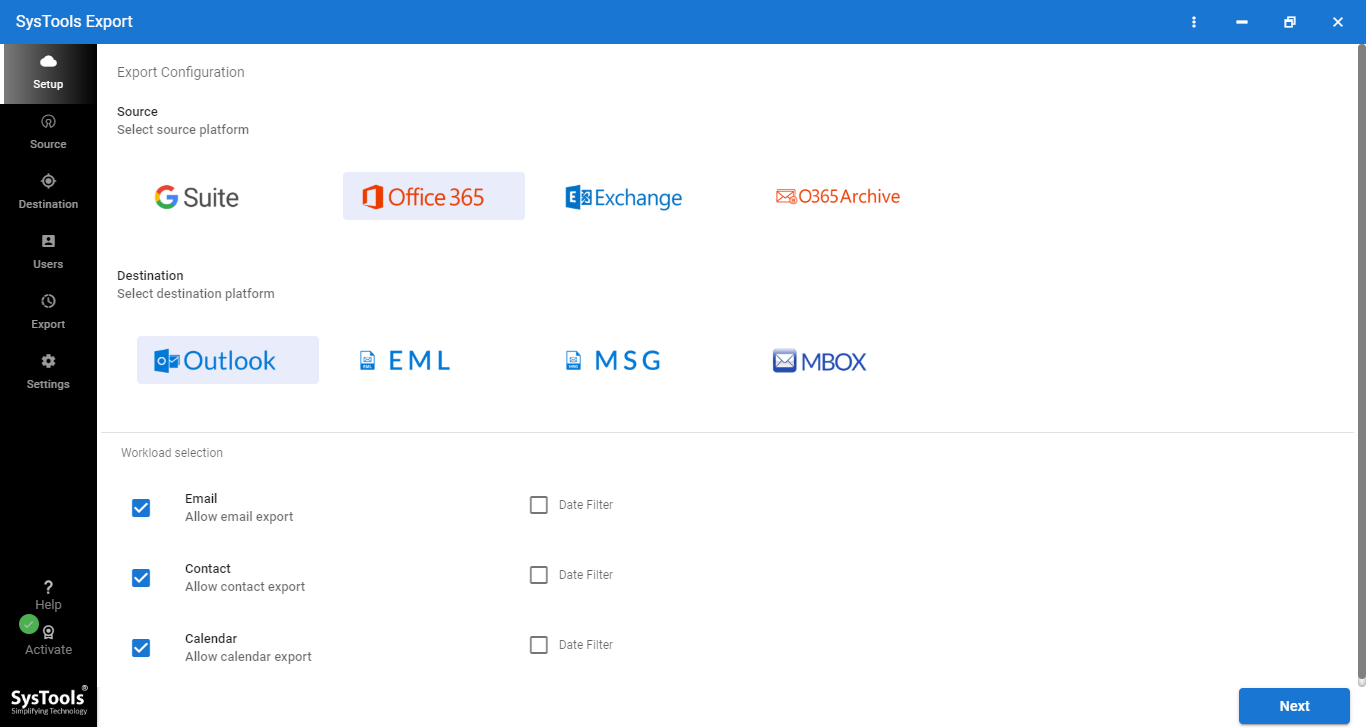
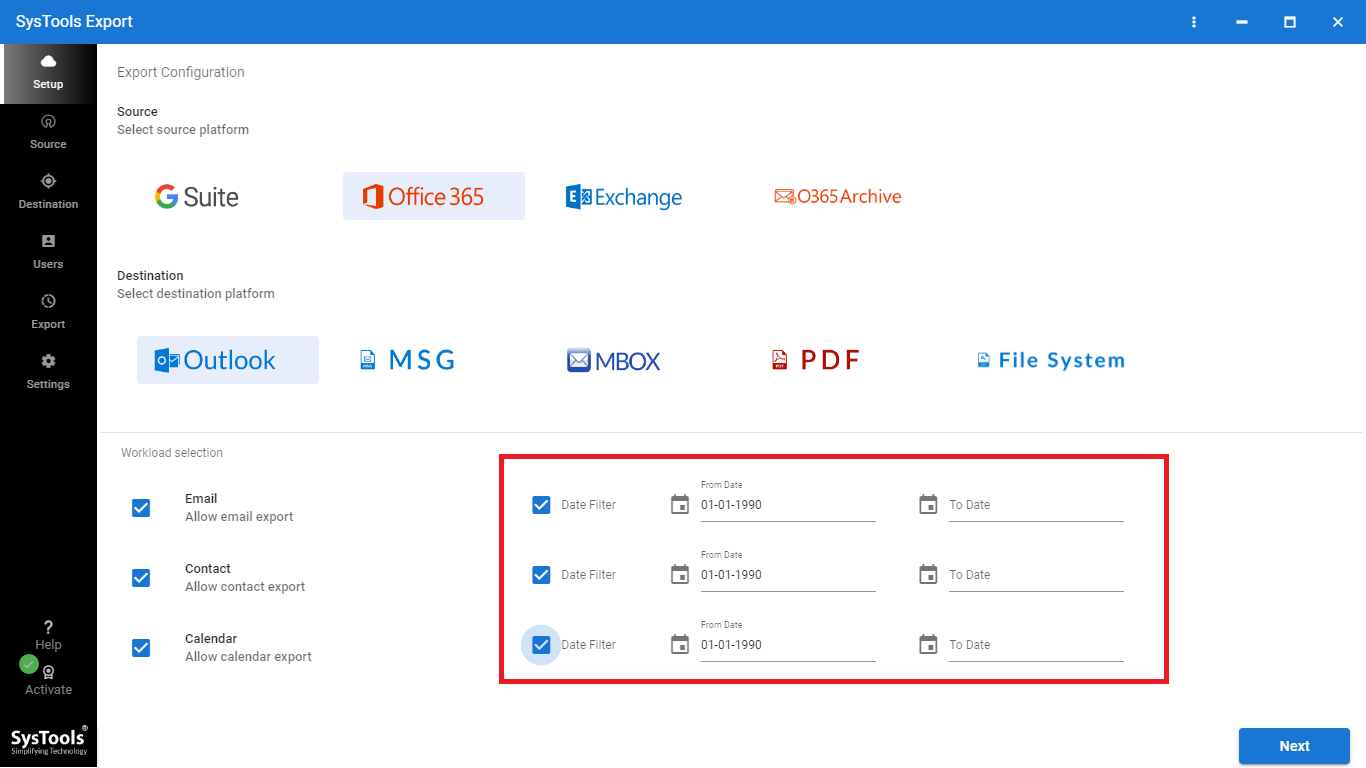
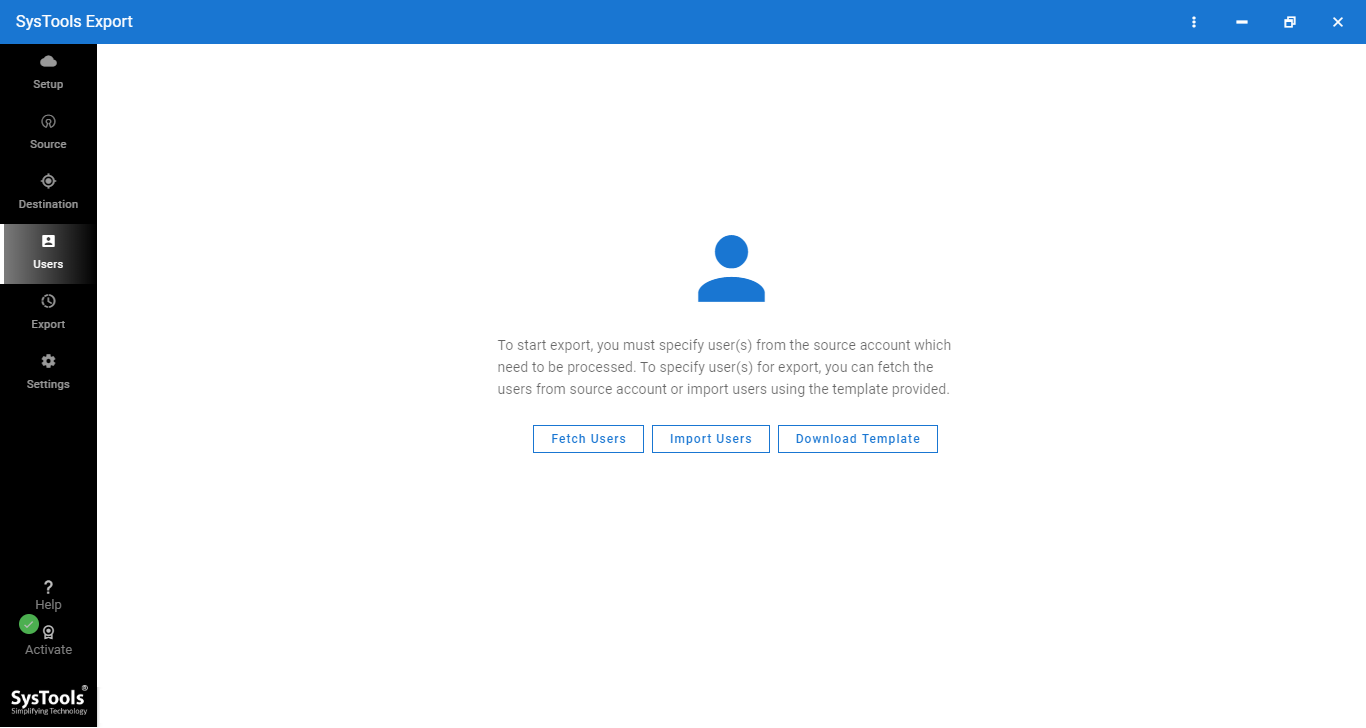
- Export Office 365 Mailbox in PST, MSG, EML, MBOX and PDF Format
- Download Organization-Wide Emails, Contacts, Calendars, and Document Files
- Export All Office 365 Shared Mailboxes and In-Place Archive Mailboxes Locally
- M365 Exporter Allows Independent Date Filter on Every Available Workload
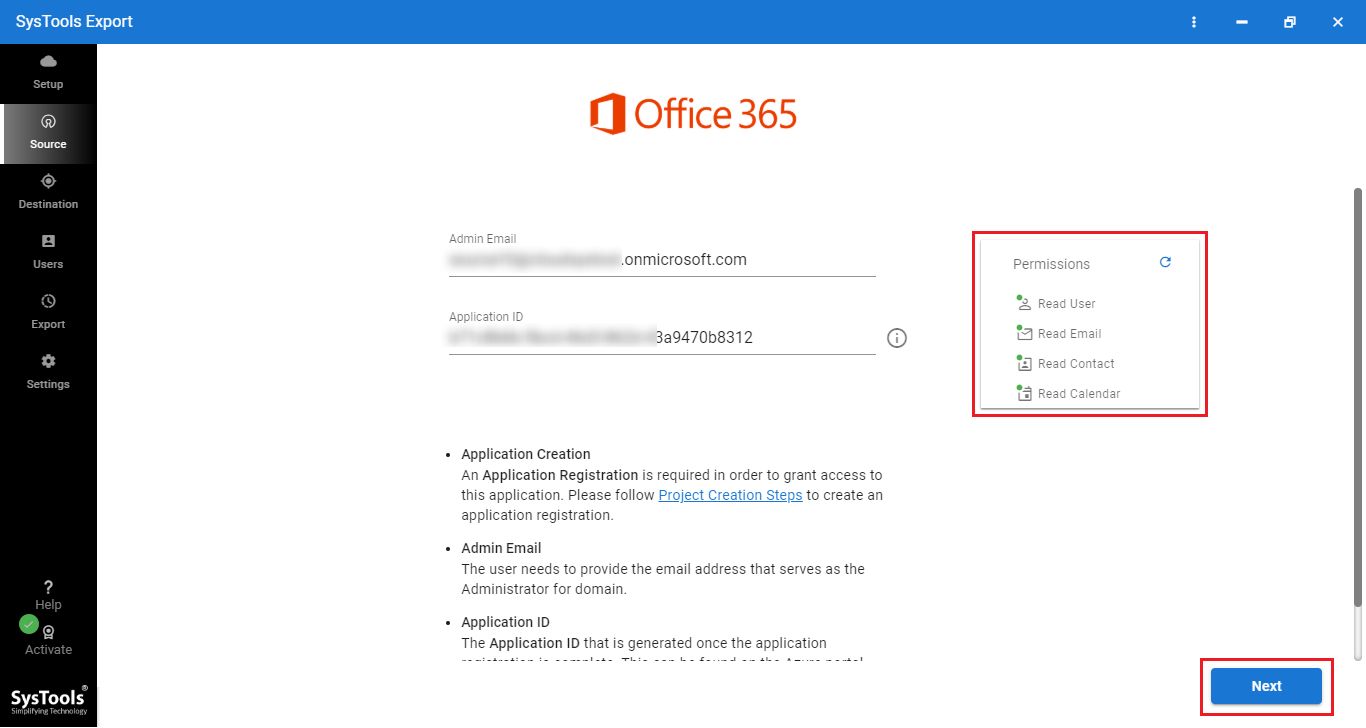
- Secure Admin Level Credential Validation to Initiate Multiple O365 Export
- Does Not Alter the Read / Unread State of M365 User Emails During Export
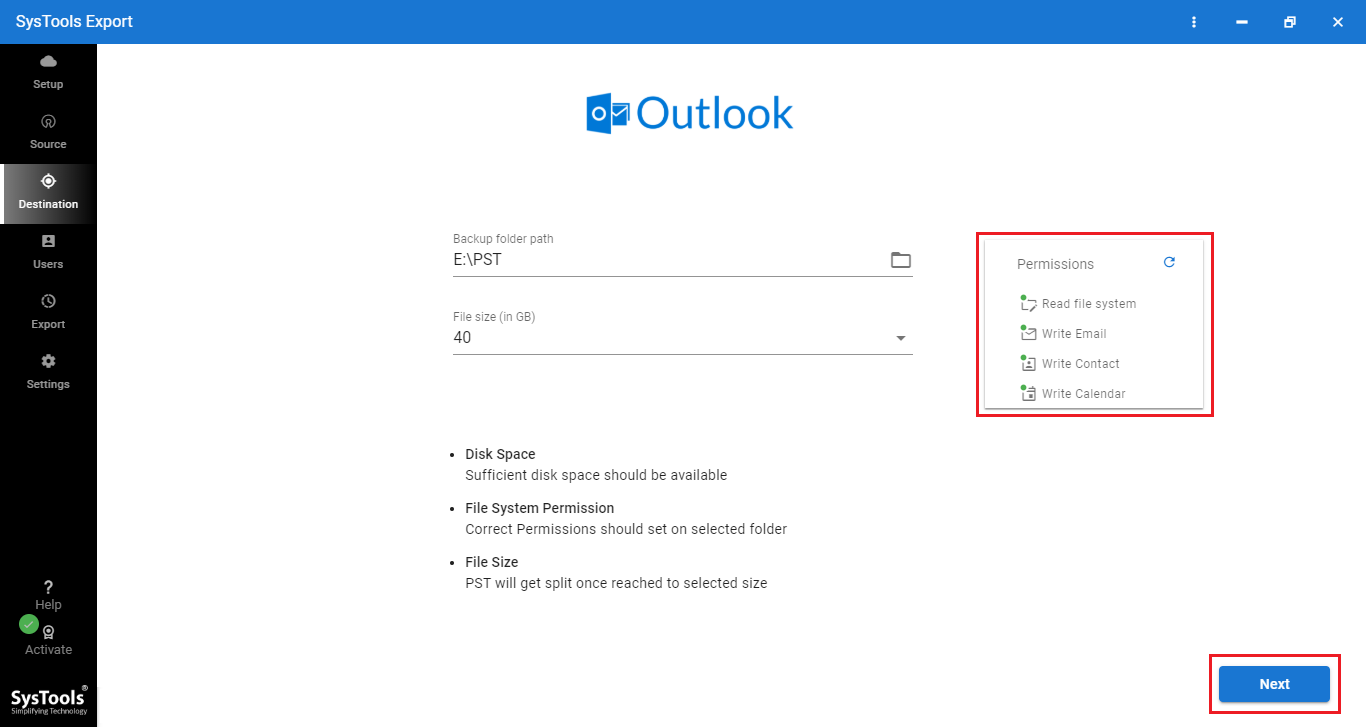
- Browse and Select a Custom Folder Path to Save the Exported Data
- Naming Convention Options for Accurate Microsoft 365 Export
- Split all Office 365 Export Files into Predefined Chunks for PST-type Outputs
- 3 User Mapping Options include Fetch, Import CSV, and Download Template
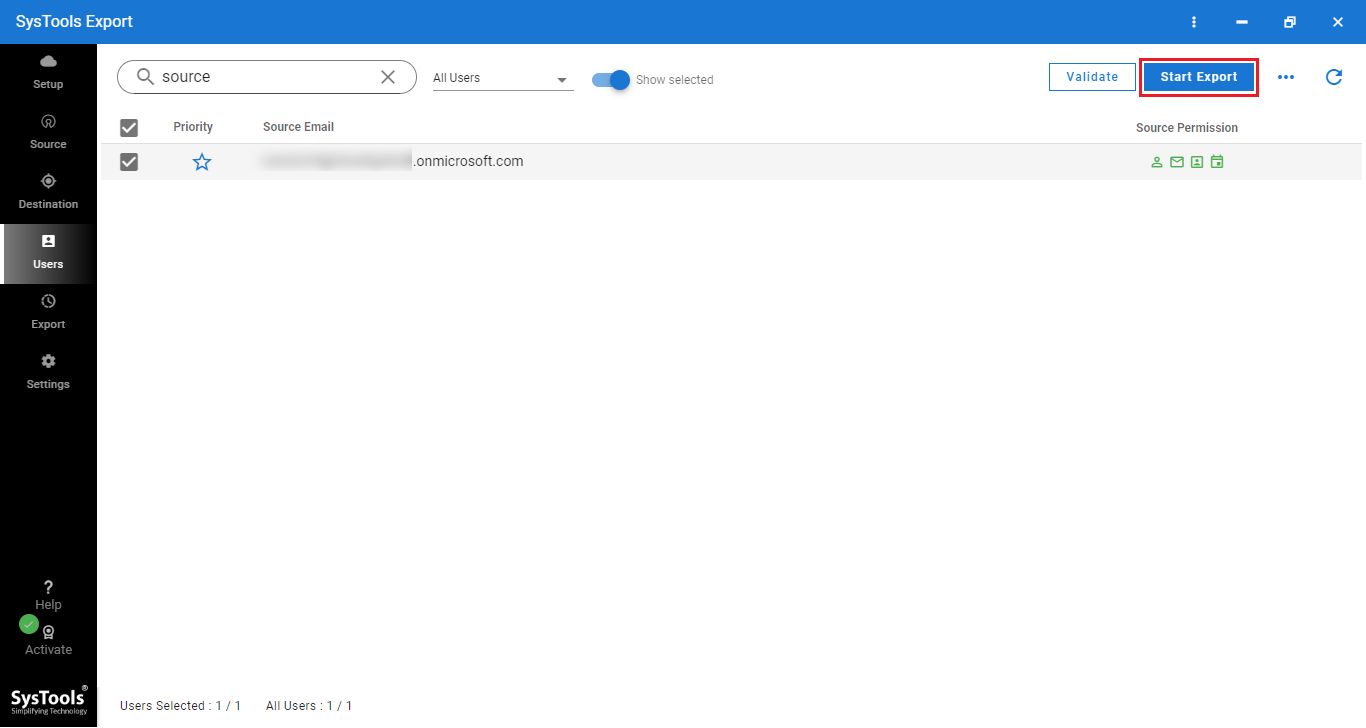
- View, Select, Prioritize, and Validate the User List Before the M365 Export
- Retry, Redo, and Perform Delta Export for Saving Office 365 Data to PST
- Generate Office 365 Export Mailbox to PST Summary and Detailed Reports
- Works With All Major Office 365 Plans and Windows Operating System
🔐
The trial edition of the Office 365 to PST export tool allows to download 2 users O365 mailbox to PST for free of cost.