How to perform Outlook.com configuration in Outlook 2013


Just like all other configuration methodologies like POP Configuration, IMAP configuration, and Exchange Server. The Outlook.com Configuration is one of the Methodologies for configuring an Account in Outlook.
Table of Content – Easy to Find
Outlook.Com – Overview
Outlook.com was one of the world’s first web-based email service providers, It was founded in 1996 as ‘Hotmail’ and later on it was acquired by Microsoft and renamed Windows Live Mail, MSN Hotmail, and then ‘Outlook.com’ in 2013.
Also, it is a web-based email account services provider such as Email messages, Contacts, and Calendars. It provides support for up to 106 languages. Outlook.com provides features such as unlimited storage, calendars, contacts management, and close integration with Drive, Office Offline, and Skype. Outlook.com also covers all the Ajax features and supports all the latest web browsers such as Chrome, Firefox, Safari, Internet Explorer, etc.
Now let us move on to the below part to learn about Outlook.com benefits. So, in the upcoming, we are going to tell you all the best benefits of Outlook.com configuration in Outlook 2013.
Also Read: Transfer Hotmail Emails to Gmail
Great Features of Outlook.com
- Privacy: Outlook.com promises to respect user’s privacy policy. It specifically targets Google’s privacy policies. It never scans attachments and emails for advertising information and all personal messages are ad-free.
- Active view: Outlook.com’s active view provides the end user the functionality to interact directly with the contents and functionality of their email message such as a picture attachment can be viewed directly without downloading the picture attachment.
- Skype: Outlook.com also supports integration with Skype and allows the user to make a Skype call within Outlook.com’s window using the Skype desktop client.
- Quick view/One-click filter: The quick view allows the end user to categorize all email messages into folders as per the user’s choice. For example, A user can categorize all the emails with attachments into one folder named “Email attachments“.
- Aliases: According to this the user can create new unique IDs to operate the outlook.com account, These aliases can be used to sign in to the user’s account.
After knowing all the important things. Now, it is time to know the solution that can help to configure outlook.com in Outlook 2013. So, in the next part, we are going to explain the step-by-step procedure to perform this Outlook.com configuration in Outlook 2013 task.
Outlook.com Configuration
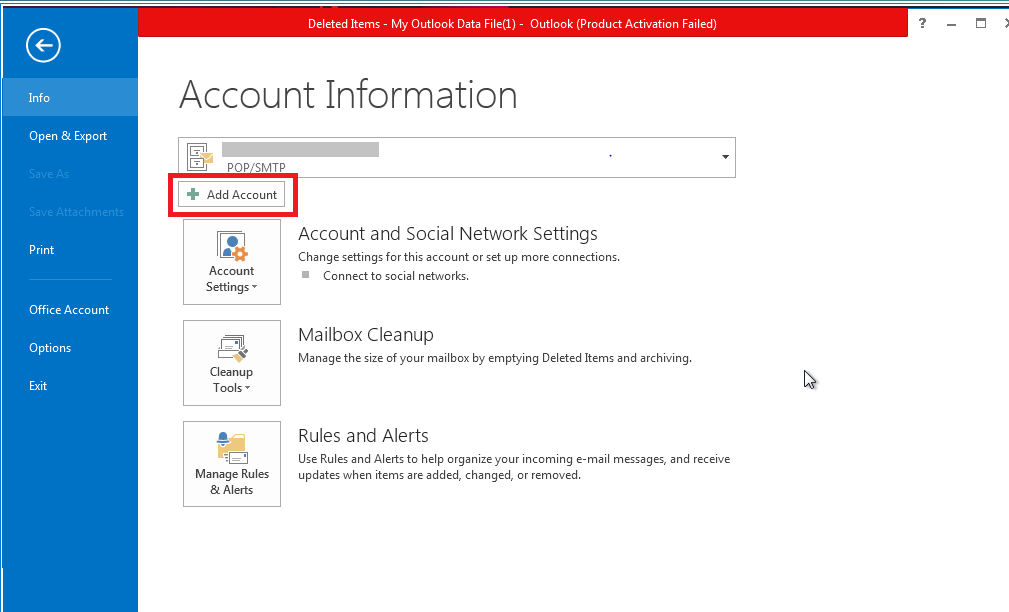
- Open Outlook, Click on the file menu, Now click the add account button
- Now, Select the Manual method
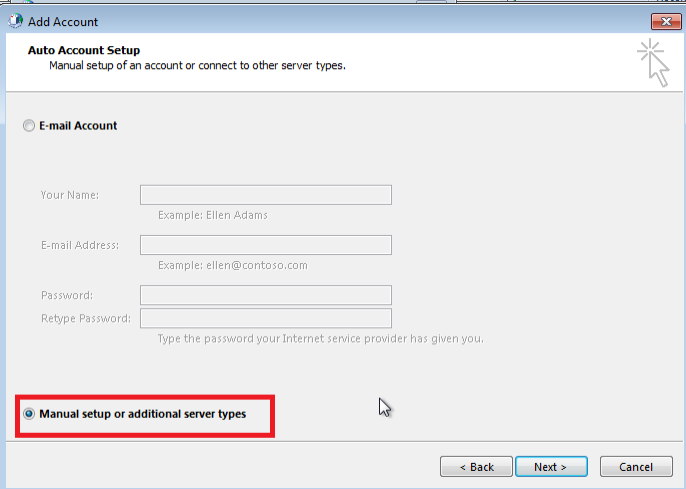
- Now select ‘Outlook.com or Exchange ActiveSync compatible service’, Click ‘Next’

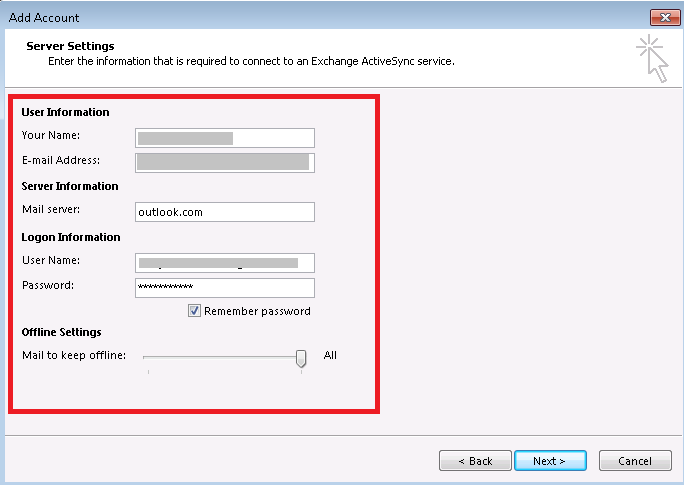
- Provide all the user details. Then click ‘Next’
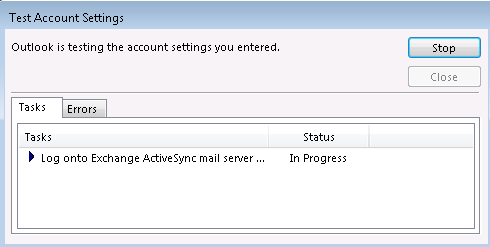
- Now, Your user Account details will be tested.
- Finally, Your User account will be configured.
Note: In case of failure in testing User account settings, fill in the user details and then Perform the user account settings test again.
Conclusion
In the above-mentioned stepwise tutorial, we have mentioned the steps for performing Outlook.com configuration in Outlook 2013. It creates an OST file in the name of the user account that has all the data about the end user’s Outlook account.
Frequently Asked Questions
Q 1: Is Outlook.com a POP or IMAP Server?
Ans: Outlook.com (Microsoft) offers IMAP access to your account, allowing you to connect to your email via mobile devices and desktop email applications.Q 2: How Can I Turn on IMAP in Outlook.com?
Ans: Click Email Settings POP3 & IMAP to enable POP3 and IMAP access to this account. Confirm the changes by clicking Save, and then launch your external email software. Select File Info Add Account. The Outlook wizard for creating a new account will be launched.Q 3: Is Outlook and Outlook com the Same Thing?
Ans: Outlook is the Microsoft Office suite’s mail client application. Outlook.com (formerly Hotmail) is a free web-based mail service.