Learn How To Set Up Automatic Signature In Office 365 Account


Traditional letters have turned into emails in modern time, but properties like signature have remained the same. Moreover, users can now set up email automatic signature. It allows users to include a particular signature by default with all the emails they send. Unfortunately, many users do not know the method of setting automatic signature in Office 365. Today readers will know how to set up automatic signature in Office 365 account. Before knowing the causes and method of setting up auto signature, here are some queries regarding automatic O365 email signature.
“As an administrative coordinator of a renowned enterprise, I want to set up automatic signature for all our employees. It will save them from typing signature every time they send an email. Exchange Online provides cloud service to our company. How can we set Automatic Signature option for everyone? Looking for some expert solution here.”
“We have 50+ employees in our school including teachers and staffs. Recently we have planned to include automatic signature with everyone’s email as a part of branding our school. We need to set auto signature in Office 365 as all emails are synchronized with O365.Can anyone suggest an easy way to set that up? Thanks in advance.”
Importance of Setting Automatic Signature
Signature in an email usually consists of name and designation of sender. It may also contain disclaimer at times. Setting up automatic signature saves time and labor of email senders. Once it is set, you do not have to type your name and other information after each and every email. It will be there at the end of your emails. This saves senders from the embarrassment of missing signature at a hasty time. To avail this benefit, many users including Exchange Online users want to set automatic email signature in Office 365.
Manual Method to Set Up Automatic Signature in Office 365
Users can include text or image as Exchange Online automatic signature. It can be added to OWA account manually by using Exchange Admin Center (EAC). EAC is a management console that helps to maintain and monitor Office 365 account. Follow these steps to set your automatic signature manually using EAC.
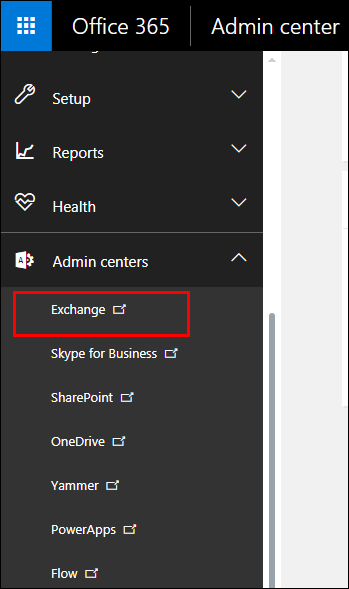
1. Login to Office 365 account. Go to lower left navigation of EAC and click Admin centers. Now, select Exchange
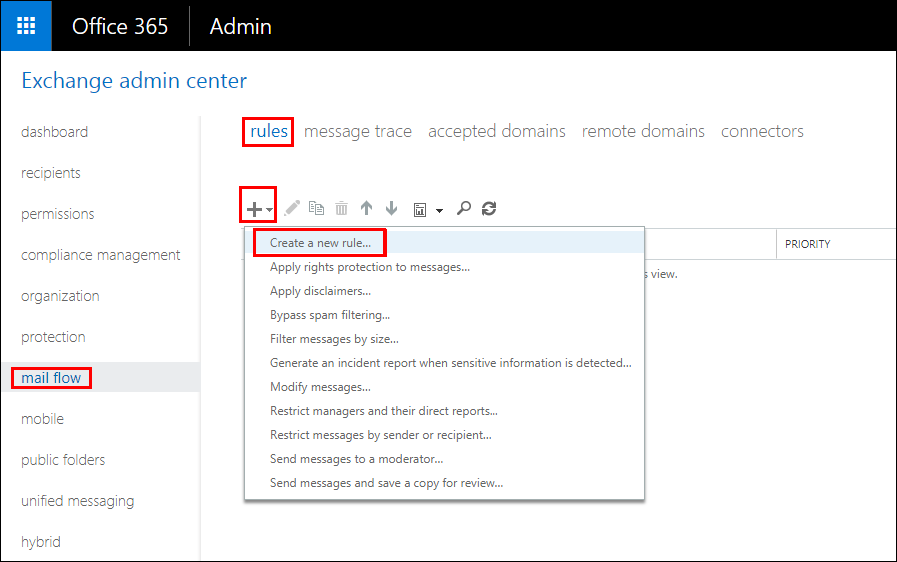
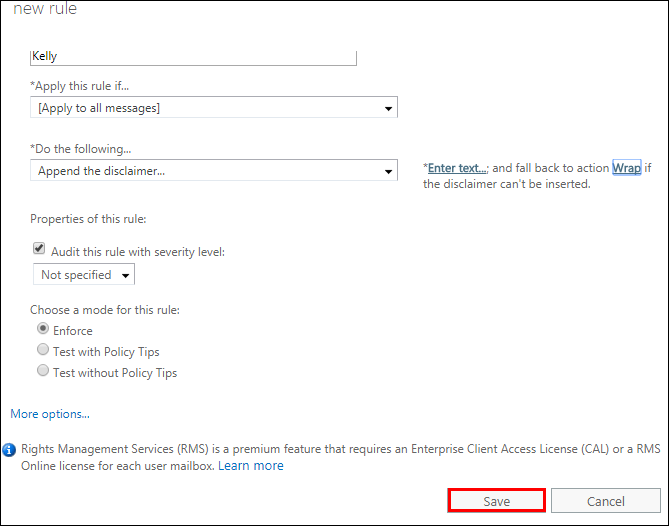
2. Go to mail flow option on left pane, click on + icon under rules tab and from drop down menu select Create a new rule
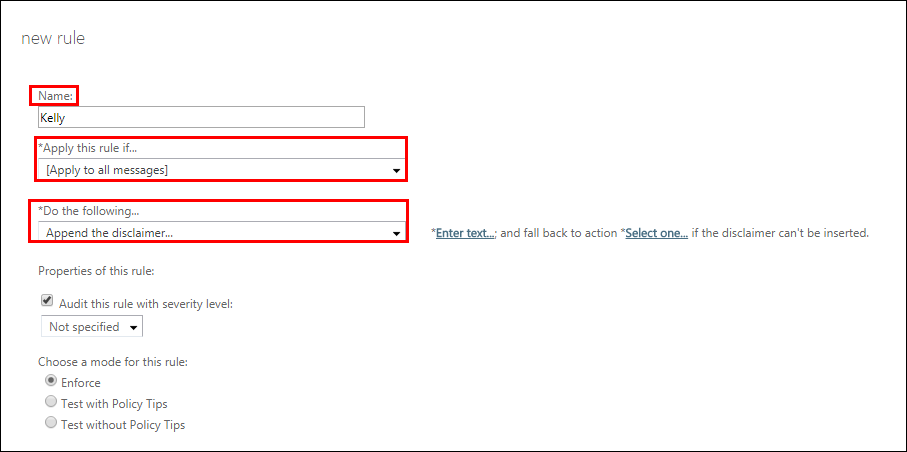
3. Enter the rule name. For ‘Apply this rule if’ option, select Apply to all message. For ‘Do the following option’ select Append the disclaimer. Click on Enter text link. Input the text in the disclaimer section. HTML tags can be added here. Now click OK

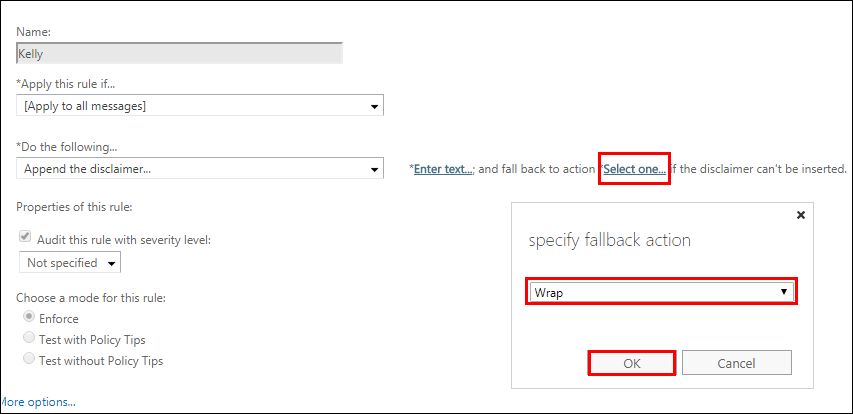
4. Now, click Select One link >> choose wrap. Click OK and then Save
5. Send an email to any other address to check if the settings have been implemented. Do not add any signature manually
6. You will see that signature has been added automatically.
Conclusion
Signatures can be called the representation of our identity. Automatic email signature set up in Office 365 plays an important role in saving time and effort of O365 users. It enhances the credibility of the emails you send. At the same time, it can be used as a branding tool. After reading this write-up, readers will know how to set up automatic signature in Office 365 account. It is expected that users can perform this method to set Office 365 automatic signature without any trouble.