CREATE NEW OUTLOOK PROFILE


Microsoft Outlook 2010 and 2013 are one of the most popular and commonly used email client versions. This personal information manager (PIM) is available as a part of Microsoft Office suite. The email client is a standalone application but can also be used with Microsoft Exchange Server and Microsoft SharePoint Server.
Creating New Outlook Profile:
Microsoft Outlook supports Exchange Server as well as IMAP, POP3 and web–based mail accounts. All the email accounts that have been connected in Outlook are stored within profiles. A profile has accounts, data files and settings.
When Outlook is run for the very first time, a new profile is automatically created. Sometimes, you may be in the need for more than one profile. In such situations, you can add a new profile. Follow the below mentioned steps to create a new profile.
1. Click on the Mail icon in control panel on your system:-
Go to the control panel of your system and click on Mail icon.
Go to=> Start=> Control Panel=> Mail,
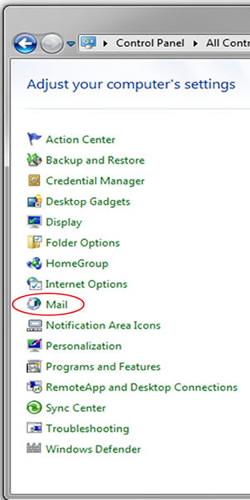
Note:- The Mail icon in control panel will appear only if Microsoft Outlook is installed on your system and has been used at least once.
2- Click Show Profile Button.
Click on the Show Profiles option to get started.
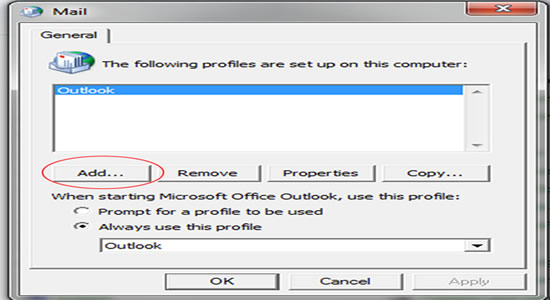
3-Click on the Add button.
To create/add new profile, just click on the Add button.
4. Enter Profile Name: –
Enter the desired profile name in the pop up window and click ok.
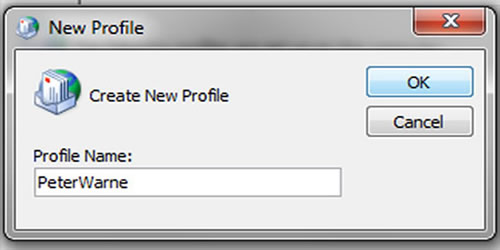
Tip: The profile name can be your name or anything that might help you to recognize and associate the profile with you.
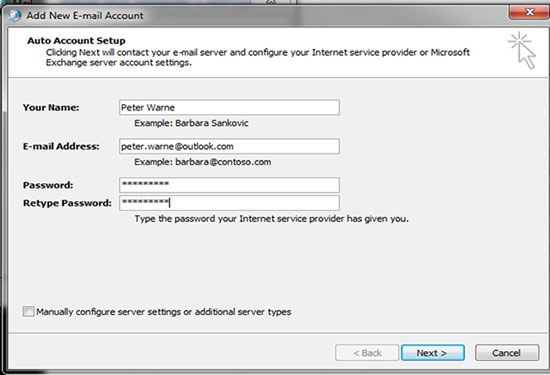
5. Input Your Email Credential.
On the Add New E-mail Account window provide information, which includes:
Name (Can be anything)
email address (of the email ID that you want to configure with Outlook)
password (of the email id that you have provided)
Retype Password (To make sure the password you entered above is correct).
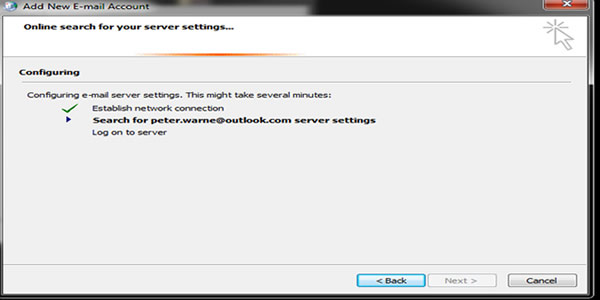
6. Wait For The Automatic Configuration To Get Completed
Wait for the application to authenticate and configure your email ID which usually takes 3-5 minutes.
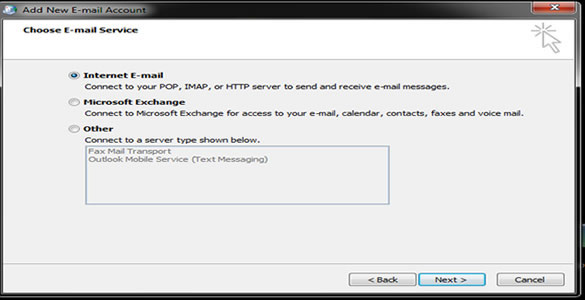
7. Choose Email Service: –
Keep the default setting unchanged and make sure to choose the first option provided (Internet E-Mail radio button). Click Next.
8. Finish Configuration: –
Now Click on Finish button and your new profile will be configured.
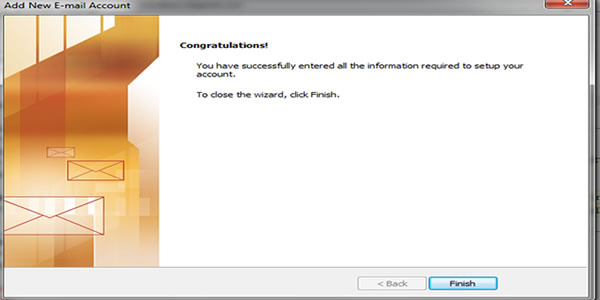
Start your Outlook Email Client to get started with your newly created Outlook Profile.